June 29, 2026
It’s Time for the June Completed Album Challenge PLUS a Layout For Your Happy Day Moments
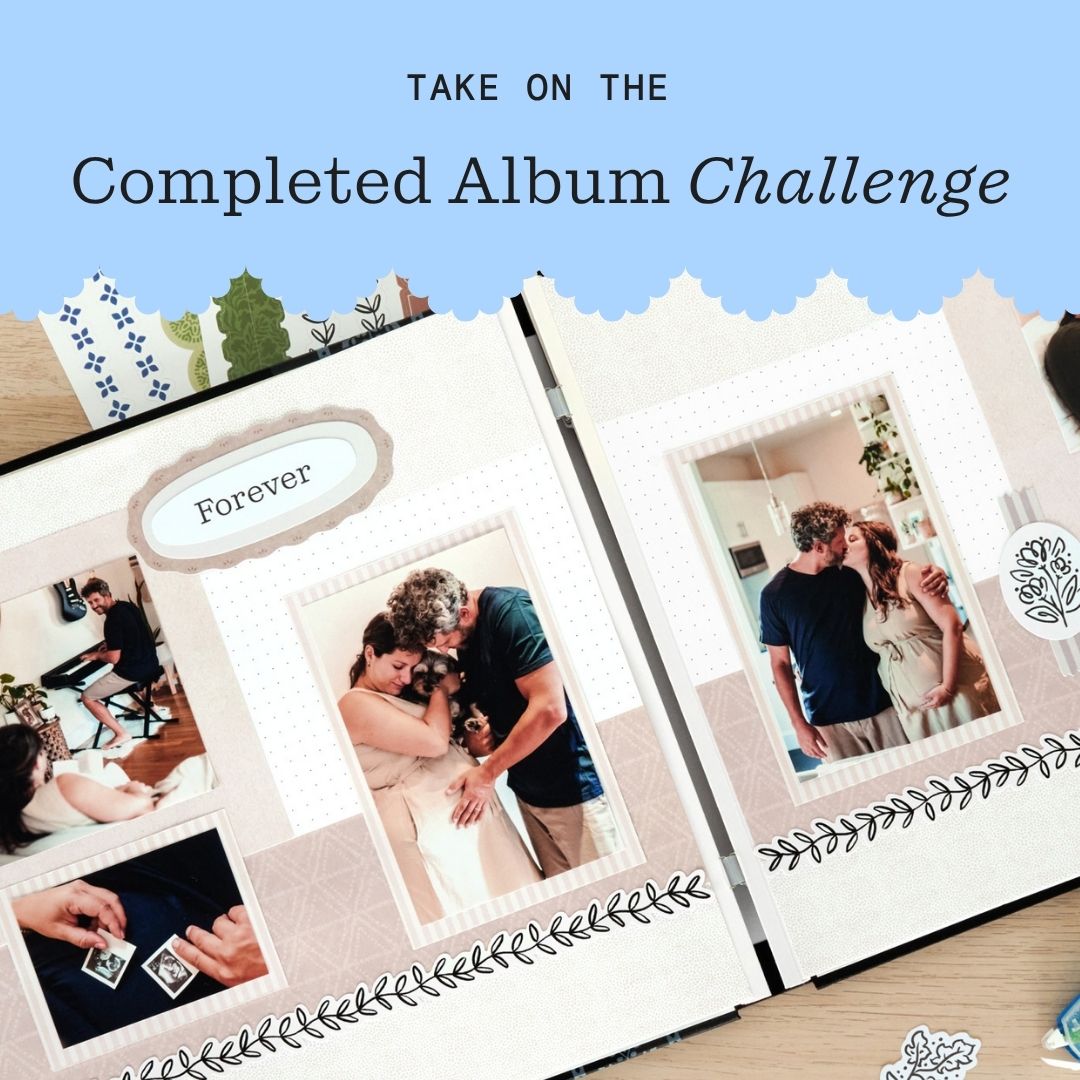
Finished an album this month? Now’s the perfect time to head over to the Virtual Crop Group and show it off during the June Completed Album Challenge! If you need inspiration to get those last few pages done, check out the layout below to document your favorite memories!
Once you have completed your album (it does not need to be from start to finish in June, just completed in June), make a short video flipping through each of the pages in your newly completed album to share. Then, post your video in the Virtual Crop Group with the hashtag #CompletedJune2026 by July 5 at 11:59pm CT (AU: 6 July at 2:59pm AET) for the chance to win!
For ALL the details on the Completed Album Challenge, check out this blog post.

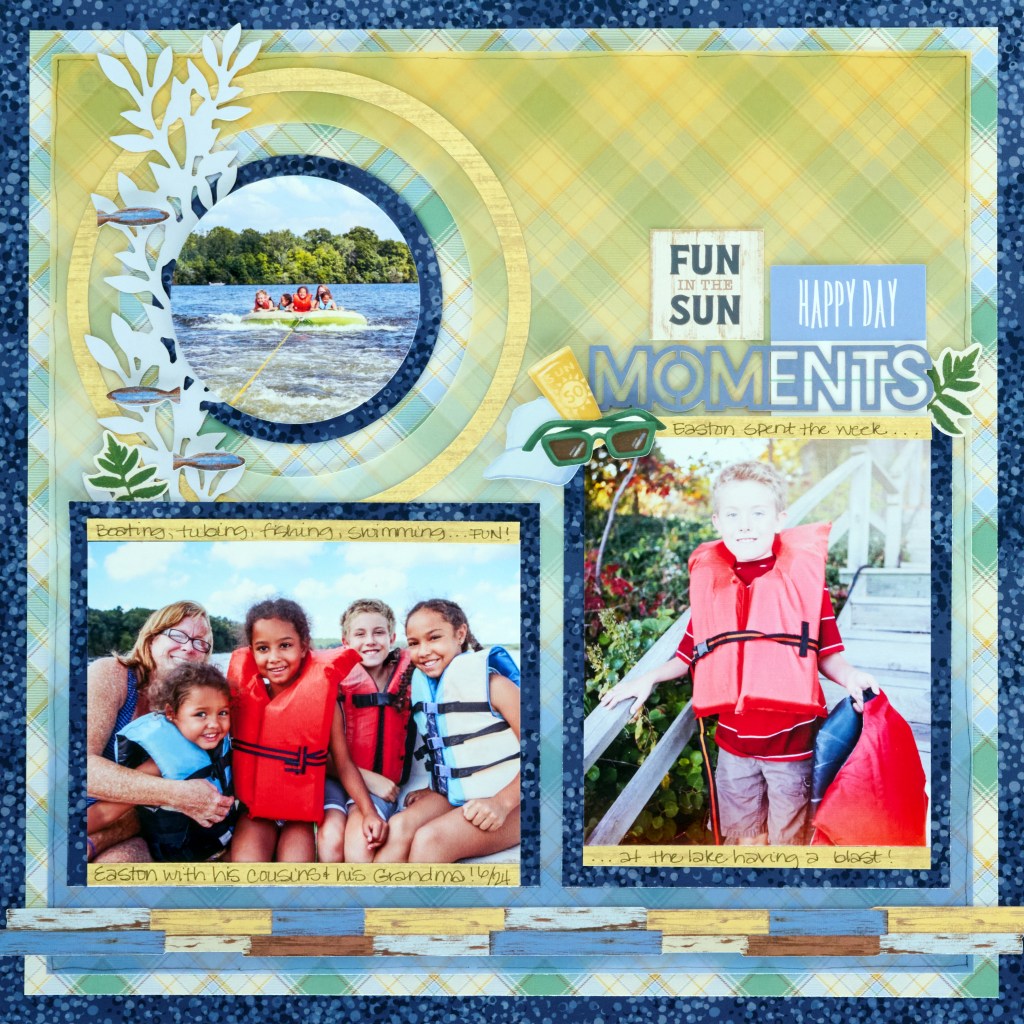
To create this layout, you will need:
- Cornflower Blue Vivid Melodies 2 Paper Pack
- Cornflower Blue Vivid Melodies 2 Embellishments
- Cornflower & Canary Vivid Melodies 2 Vellum Paper Pack
- Lakeside Memories Paper Pack
- Lakeside Memories Stickers
- CCS Bundle
- 12-inch Trimmer
- Photo Trimmer
- Repositionable Tape Runner
- Vellum Tape Runner
- Foam Squares Variety Pack
- Black Dual-Tip Pen

Step 1: Using a piece of the dark blue designer paper in the Vivid Melodies Cornflower Blue Paper Pack, gut the center leaving a 1-1/4″ frame around the edges. Use the frame as the base for this layout. Set the inside piece aside.
Step 2: Cut a piece of the plaid designer paper from the Lakeside Memories Paper Pack to measure 11-1/4″ x 11-1/4″. Adhere the paper to the center of the layout.
Step 3: Cut a piece of the Canary & Cornflower Gradient from the Vellum Paper Pack to measure 10-3/4″ x 10-3/4″.
Step 4: Place the vellum on the 13×13 Cutting Mat in the upper left corner, then place the small CCS circle so the edges touch the 1″ mark on the top and left side. Cut out a circle using the outside of the small CCS circle with the red blade. Adhere the vellum paper with the circle cut out to the plaid paper using Vellum Adhesive.
Step 5: Using the yellow woodgrain designer paper from the Lakeside Memories Paper Pack, cut out a ring, using the outside of the medium CCS circle with the blue blade first, and then the red. Adhere the ring around the circle opening in the upper left corner of the vellum as shown above.
Step 6: Using the dark blue designer paper left from the inside of the base piece, cut out photo mats measuring 5-1/2″ x 4-1/2″, 4-1/2″ x 5-1/2″, and a circle using the inside of the large CCS circle with the red blade. Adhere the mats to the layout as shown.
Step 7: Adhere photos that measure 5″ x 4″, 4″ x 5″ and one photo cut using the inside of the large CCS circle with the blue blade. Then cut two strips from the yellow woodgrain designer paper to measure 5″ x 1/4″ and two strips to measure 4″ x 1/4″. Adhere the strips along the top and bottom of the rectangular photos and journal on them.
Step 8: Adhere stickers and embellishments, using Foam Squares on some for added dimension.
Step 9: Use the Black Dual-Tip Pen to “doodle” along the outer edges of the vellum.
P.S. Are YOU a member of the Virtual Crop Group? It’s your go-to place for MONTHLY Virtual Crops, MONTHLY Completed Album Challenges, QUARTERLY Secret Box Openings with project tutorials and so much more! We hope you’ll join our community of more than 53,000 fellow memory-keeping enthusiasts — you’ll feel right at home!


Melissa, you hit it out of the ballpark with this layout! Love it.